Crazy mouse speed fix
Tuesday, January 6th, 2015I recently bought a Logitech Business Mouse but when I plugged into my desktop (running Gentoo Linux) it was running at ludicrous speed.
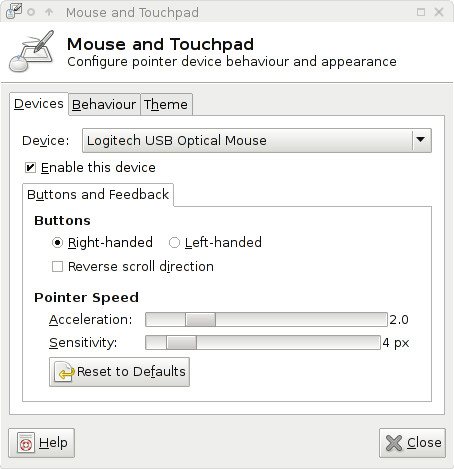
When I opened the “Mouse and Touchpad” UI and tried changing the Acceleration down from 2.0 to 0.1.
 This made the mouse better but I didn’t like how it felt. I cant really describe what was wrong with it.
I found this blog which said I could enable “Constant Deceleration” to fix this issue so I ran :
xinput --list
which lists the core pointers
Virtual core pointer                    	id=2	[master pointer  (3)]
⎜   ↳ Virtual core XTEST pointer              	id=4	[slave  pointer  (2)]
⎜   ↳ Logitech USB Optical Mouse              	id=12	[slave  pointer  (2)]
I then ran :
xinput -set-prop "Logitech USB Optical Mouse" "Device Accel Constant Deceleration" 2.5
which slows down the 800dpi to be closer to my older mouse. This meant the mouse was working the same my old Dell one but it wasnt being remembered after a reboot.
Created /etc/X11/xorg.conf.d/50-mouse-acceleration.conf with the following contents
Section "InputClass"
   Identifier "Logitech USB Optical Mouse"
   MatchIsPointer "true"
   MatchProduct "Logitech USB Optical Mouse"
   Option "ConstantDeceleration" "2.5"
EndSection
Note : sudo emerge -av x11-apps/xinput

